Sep 28, 2010
Quick Card Set
Just wanted to share this really quick 3 card set with you all. As well as remind you all that tomorrow is the last day to join in on my challenge. Reminder that starting with this challenge I will be combining the entries for this and the next challenge to win the cricut cartridge. (I still haven't decided on the Cartridge title yet I know I'm SLACKING)
Ok now onto the card set. I made this set for my Grandma who has a really green thumb. she asked me for some cards that she can give away for her upcoming friends' birthdays. These were very simple to put together. Many of you may have seen them during the afterchat on madebymomo live!
I first drew the cuts with my Purple Cricut Marker then cut them out. I used the hide contour feature on the flower leaves when i cut them out so it didn't cut out out on the leaves lines. the flower from Walk in Garden at 4 inches. I cut the Flower vase also from walk in my garden at 2.25 inches. I trimmed the leaves off from the stem and arranged them under neath the head of the flowers.
The sentiment is from Papertrey Ink Communique Curves Sentiments, heat embossed with White Embossing Powder.
For the Vase I used All Night Media Clear Glass Finish Liquid Embossing to give it a glass effect
The Paper base is Papertrey ink, I am not sure of the color offhand, and the Pattern paper is My Mind's Eye Simply Delightful stack
Finished the card off with some maroon ribbon and a green button tied with twine.
I hope you enjoy this really quick and simple card set. I will be posting a video tomorrow :)
Sep 27, 2010
Caught up on Videos!
Sep 25, 2010
Saturday Share & a 3 AM card
The week has turned around already. I cannot believe it. And now it's my most favorite time of the year fall. Although I was born in may it seems like I am a true fall baby at heart. I love all the warm clothes and the cool breezes, and to be honest May is always so very rainy here in Western New York, so Fall is just the right change.
I am not sure what I love about fall, I think that it's the last of the warmth before winter hits, and here in the suburbs of Buffalo, the winter season is the longest one of the year. From about Thanksgiving to Right around St. Patricks Day, it can be a frozen cold mess. So, for anyone in buffalo we cherish our short few weeks of fall.
Speaking of Fall, my daughter is turning one on the 16th, and that should be very exciting, so I hope to be sharing alot more "Birthday Projects" as well as I am in a few blog hops in the month of October.
Tomorrow will be the last day to join my Card swap due, so if you were thinking about joining, now is the time. The Due date is Decemeber 1st, and they will be returned swapped by Dec 15th, so you would have them in time for the winter holidays. Please refer to the page here for guidelines and to sign up.
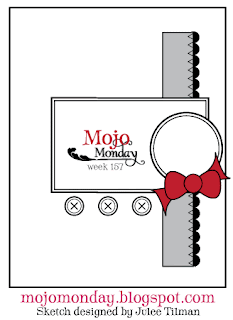
Last but not least I wanted to share my 3am-4am card that I made last night. I just could not get to bed for some reason. It started off as me trying to use one of my old greeting farm Anya Stamps. I haven't done watercolor pencils in about forever. Then I decided to turn it into a Cricut-less project. Then I tried to use the mojo monday sketch and to top it off I went a little bit doodle crazy. I even doodled on the polka dots and they ended up loooking like gum balls. i dont know what I was thinking. Probably because I just found this amazing new white pen. Called Milky Way white and it's by American Crafts. It's SOOO opaque and awesome
Love it!(the pen)
I really do like how the coloring on the stamp came out. I would name all the watercolor pencils I could, but that would take forever.
have a safe and enjoyable weekend
ps my mtc tutorial wasn't syncing up with the sound so I deleted it, I'm going to upload a new one this afternoon.
Sep 23, 2010
Lettering Delights Projects
Sep 22, 2010
Companion Challenge: Falling for Fall
People call it by different names, Autumn, Fall, OtoƱo, but whatever you call it most people associate this colder change in weather with the changing colors of the leaves.
This week's companion challenge is to create a fall inspired project using reds golds, yellows browns (the colors found in the fall) as well as having leaves somewhere in your project.
Just take a look at the amazing project completed by Joanna B over at Scrap-Making
I loved this simply charmed scarecrow. He's tooo cute. Joanna used some beautiful recollections paper for her leaves. Super cute?!
For my project I created not only one card, but two. I wanted to give a quick tutorial on how to cut and print using your printer and your cricut expression and after finishing the first card (turkey) i had to make a second since they came out just soo cute.
I used the "Me & my Big Ideas" Cornucopia paper, and It had some leaves of fall colors but not only that but some great pinks and purples, so my first card, did use the fall colors but was more on the brighter fall spectrum
For my Second card I also used the Cornucopia "leaves" designer paper as well as some scraps of Recollections friends forever designer paper.
For both of the cards, I used my super favorite Lettering Delights Stuffing Stitches Clip Art Set and for a limited time they are on sale, along with the rest of the lettering delights graphics for 1 dollar saves you 75%. if you were thinking about trying out cutting and printing with your cricut and printer, now is the time. they have some amazingly cute stuff!!!
Back to School Companion Challenge Winner
I've been out of the house so much lately. I ALMOST forgot to post the winner!!
The winner of the Elmo's Party Cricut cartridge is...
Drum roll.........
......
Congrats to A Busy Bee/Double Click Connect
Please send me an email with your mailing address so I can get your prize out to you.
Also I wanted to add a bit of change to my companion challenges, to give those who particiapte in them every month a greater chance to win. I will be combining the challenge numbers so that if you particiapate in both you will have a greater chance to win the prize.
Also it saves my sponsors money and allows me to have better prizes. Not that cricut cartridges aren't bad prizes.
Congrats, and thanks to everyone who enetered. If I haven't commented on your entry yet. Dont worry I'll finish them today!
y
Sep 19, 2010
Card Swap Guidelines & Sign Ups
SWAP is only open to US swappers.
This is a very simple swap. Make 5 Cards get 5 Cards back.
Swap is due Mailed to me NO LATER THAN DEC 1st 2010. So this gives everyone a few weeks to come up with the card ideas and mail them out. When you are ready to send your set please email me and I will provide you with my mailing address.
Cards should be swapped out and return mailed to you by Dec 15th.
This swap has 5 Categories
- Birthday
- Thinking of You
- Get Well
- Thank You
- And Sender's Choice
Each Swapper will Complete 5 Cards, and in return receive 5 Different Cards back from different crafters.
You are welcome to make additional cards sets. if you send 2 cards of each category you will get 2 cards back of each category, all from different crafters. you must send the same number of cards per each category just to save confusion from my part.
Cards must be no smaller than standard A2 size, but can be Bigger. Envelopes must be sent with the cards, of the appropriate size. Cards can be Tent, Try Fold, Gate Fold, pop up, what have you as long as it fits in an A2 size envelopes.
There are not many design guidelines for this swap, except to make a card you a proud of. Using good quality/sturdy cardstock and adhesives. MTC/SCAL are allowed!
Embellishments/stickles/ stictching /inking/stamping are not only allowed but recommended. Go all out!
On the back of your card, please stamp/ write, the card category your name as well as your "Blog name" so that the recipient knows where the card came from.
Please bag each of your individual cards with the envelopes in either a cello bag or a ziplock bag, in order to make sure that th ecard stays with its envelopes. as well as good condition
Cards can be mailed out which ever method you chose, as long as they arrive to me on time. Cards will be returned mailed via priority flat rate. so Please make sure to include appropiate Postage for the return. 4.90 stamp or the sum of 4.90 in lose postage (not metered) in an envelope . if you'd like confirmation/ tracking please include 30 cents. and a note saying that you'd like that. Do not forget to have your return address!!! on the envelope.
I hope to make this a really fun swap. So please once again, do not sign up if you are not 100% committed to joining the swap. I will be making 5 cards for the swap as well :)
After Signing up on the linking system please Leave me a comment on my facebook page letting me know that you signed up for the swap. I will be posting a discussion board on my page to keep track of the swappers. to make sure everyone stays on track for the deadline.
If you have any questions please feel free to email me using the contact me form.
Hubby Challenge
It's Challenge time over again at Momo's and this time it was SUPER fun. the Challenge was actually for all the scrap husbbies out there, to create a card.
I suprisingly didn't have to do much convincing to get Ryan to make a project, but I did have to help him out a little bit with the Cricut, he didn't have any idea what buttons to press.
Of course he decided on the mini monsters cricut cartridge, because ever since it came in the mail he had his eye on the grim reaper.
So this is his super simple card,
But for now here is his card, and leave lots of warm fuzzy feedback because this was his first card ever and he came up with it by himself and he will be reading them
He used the Scrappy Moms A Haunting we Will go Stamps and the K& Company Spooktacular Paper.
Sep 14, 2010
Episode 47: Naptime Layout
My Daughter's Birthday is just around the corner so I've been in a major SCRAPBOOKING mood, actually more of a frenzy. I've been trying to get some of her remaining older pictures scrapped before her party so that her 1 year old scrapbook is as close to completion as possible. So here's a good step in the right direction
I've had a few requests for more "Gypsy" in my videos, so I attempted to film a little explanation of how I design layouts in my gypsy. Which is just the standard 12x24 technique.
I cannot believe how many cricut cartridges I used in this layout. I feel so proud of actually using my cartridge stash!
Cuts Breakdown
NAP cut from Cursive 101 at 3.31 inches (used shadow blackout feature as well), welded together
TIME cut from Winter Woodland at 1 3/4 inches, hide contour for the inside cuts (used shadow feature as well), welded together
MUSHROOM/BUTTERFLY cut from Sugar & Spice (lite) at 6 1/2 inches
FLOWERS cut from Sugar & Spice at 4 inches
SUN cut from Create a Critter at 4 inches
Enjoy the video
** i didn't show it in the video but i decided my layout looked a bit empty so I added clusters of buttons tied with hemp cord***
Supplies
DCWV Dot lines Designer Paper
Pink Cardstock We R Memory Keepers Teen Angst Stack
Green 5/8 Grograin Ribbon
Fiskars Apron Lace Border Punch
Signio White Gelly Roll Pen
PK-640 Princess Assortment Stamps
Star Dust Stickles
Lots of Buttons
Hemp Cord
ATG, Scotch quick dry, Zig, Zots
Sep 11, 2010
Saturday share
Life is busy again in my house. Living in the snow capital of the USA, we all know that fall is just around corner, and that means 2 weeks mild fall like weather then BLIZZARDS until march! So we've been enjoying the last few days of summer by catching up on last minute home improvements and cleaning! Which left very little time for crafting, but now that its mostly done I am happy to say that I'm now free to resume my regular paper activites :)
As well as with the fall, it means my daughter's first birthday is just around the corner.(Oct 16th) Where did the time go?? It feels like just the other day I was talking long walks down the block hoping to speed up her arrival.. Well more like waddling. Now she's moving all over the house and getting into everything!!! I am having a small party and making my own invites/ decorations and party favors, so look for those towards the end of this month, hopefully sooner because I don't want to procrastinate too much.
I have been working hard little by little to start my christmas cards, and so far have 2 sets done. Now only about a million to go. I am loving this winter frolic cricut cartridge and I hope to use it in a tutorial soon because I have some winter pictures from last year that I am behind on. But unfortunately none of the snow-- my daughter was much too young to have her out in the snow last winter but this year for sure I will have to get some snapshots. I'm looking forward to sledding in the park :)
As far as cricut cartridges are concered I am taking a buying break because I have wayy too many that I recently purchased and have yet to use. Plus I have oldies that I haven't so much as touched! So if you have any requests please leave them here. I might do a cartridge spotlight every monday for a month using one cartridge. I think that would be a good way to use them up each equally. :) let me know what you think of that idea.
Finally, and most importantly.. Today is a very sad day in history for US americans. I can still remember what I was doing this day 9 years ago. And I'm working on scrapbooking my memories as a memorial and I encourage you to do the same , so that we can share with future generations. Even if you don't have any pictures or clipping take the time to journal down your memories. So that future generations can remember what is lost, but not forgotten.
Lots of love to you and yours!!!
Cristina
Sent on the Now Network™ from my Sprint® BlackBerry 9630 Tour
Sep 8, 2010
Companion Challenge : Back 2 School
Welcome back to another companion challenge. I apologize that this is a little late in the day, my internet has been going up and down all day. Very counterproductive, So I've extended the deadline just a little bit to get everyone a chance to enter in this week.
School is back in session this week in NY, so this week's challenge is to create a back to school themed project.
My Crafting Companion is Cristina C from Creative Memories 210. She created a School Spirited frame, using chipboard and binding rings. She created the frame as a gift for a friend's niece. Her Inspiration was drawn from highschool cheerleading and wanted to make something special for homecoming..
I just love the way she created the cluster of flowers at the bottom of the photo mat. And The colors work well together, very monochromatic!
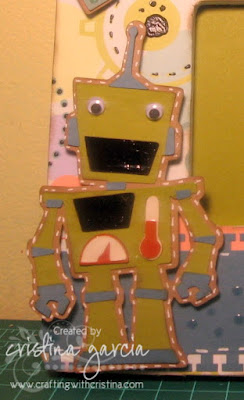
For my Project I was inspired by my little brother who just started kindergarten. They grow up so fast don't they. I wanted to make something special to have his first day of school photo, and of course what says boy more than .. ROBOTZ. I haven't used this cricut cartridge in a while, so i decided now would be a good time
The Prize for this Challenge will be the ELMO's Party Cricut Cartridge!!
Supply Credits
Robotz Cricut Cartridge,
Designer Paper Recollections, Rockets 'n' sprockets-- Gear Head
Recollections Spice Market Pack (green & orange)
Recollections Vellum
Recollections Kraft Cardstock
Various Scraps
Sentiment " Brother Gears to you!" Scrappy Moms Stamps-- For the Guys
Liquid Embosing, Clear Glass and Opaque Licorice
Googly Eyes ( not sure of brand)
Ek Success Binding Edge Punch, Tag Trio Punch
Making Memories 1/8 Eyelets
Crop-a-dile
Signio White Gelly Roll Pen
Gypsy
Sep 6, 2010
Guest Designer on Card Creations
I hope you all enjoyed a peaceful and restful labor day. I was asked earlier in the week by Christina Brooks to join a guest designer on Card Creations and more. She is having a challenge over on her website where the challenge is to use bling and ribbon. I recently recieved my rock princess cricut cartridge in the mail and wanted to use it to create a project that wasn't so "rocker-ish" instead of using the suggested colors in the cricut cartridge manual.. blacks pinks, whites. I started with my ribbon choice which was a warm dark chocolate color. I then paried it with some carolyn gavin green house paper.
I loved how this card came out. I cut the butterfly at 2 inches, and found the scalloped circle shape on Sugar and Spice Cricut lite, though there are many cartridges that have this same exact shape on them!
I used the Mojo Monday sketch of the week to come up with the idea of the card. I just loved the thought of stamping the sentiment on a tag and suspending it from the ribbon. I added a brown eyelet and attached it with some hemp cord to add extra interested the coordinating button tied with hemp cord off finished it off.
This was actually a very simple card to make and I think I will use this sketch again in the future.
Supply Credits
Designer Paper, Carolyn Gavin Greenhouse, 12x12 & Mat Stack
PTI Dark Chocolate Cardstock
Bazzil Hillary Cardstock
Kasiercraft Pearls
Dark Brown Satin Ribbon
PTI True Black Ink
EK Success Tag Punch, I trimmed it to fit the sentiment
Brown Eyelet and Crop-a-dile
Sent\ment, Scrappy Moms, The Charmed Life
Stickles, Eucalyptus, Diamond, Crystal and Icicle
Scraps of PTI Plum Pudding and Razzberry Fizz
Hemp Cord
Sep 2, 2010
Episode 45: Happy Haunting Layout
I am loving the mini monsters cartridge! It's so much fun. I was totally inspired the other day by Lauren when she made her birthday layout, it was so cute the way she had a cake spread across two pages, so I decided to do something similar using the haunted house from Mini Monsters cut at 11 inches ( I had to cut the white shadow feature on my 12x24 mat)
Supply Credits
Mini Monsters Cricut Cartridge
K&Company Spooktacular Designer Papers
We R Memory Keepers Teen Agnst Paper Stack, Green, Blue, Orange
Yellow & green Satin Ribbon Basic Basic Michaels
Stickles- Diamond, Crystal & Stardust
Buttons
Signio Broad White Gel Pen
Sakura Micron Pigment ink Pen
Paper Pizzaz Stitches Template
ATG, Tombow Mono Aqua